I now have what I fondly refer to as my "Christmas Blister". I hate having to admit that - they're awful, ugly things, that are right out there in the open for everyone to admire, and of course, I get mine at the busiest social season of the year. My body "tries" to get one every year at this time, due to the stress I put myself under to fulfill everyone's dream of the "Perfect Christmas". I know, I know - that's a fantasy, and I should let it go, but I have just enough Martha Stewart in me to believe that, "Yes, Virginia, it can be done." One of my daughters is as compulsive as I am in this regard, and I believe we have coined a new word to describe some of our efforts as being "Marthesque".
Anyway, the blister. A number of years ago, I developed one at Christmas, and a friend said, "You know, I have a "cure" for those." Right...heard that one before. Just type 'Cold Sore Cure' into Google, and see what comes up. Anyway, she gave me a recipe card with 3 'ingredients' on it, and some simple instructions:
500 mg. Chewable Vitamin C - every two hours
Acidophilus - (pill form of the active probiotic culture in Yogurt that attacks "bad" bacteria) 10 mg. 3 times a day: wake-up, mid-afternoon, bedtime
1000 mg. L-Lysine (an amino acid) twice a day, 12 hours apart - morning & night
I have a blister this year only because I awoke at 3:30 AM on Christmas morning with abdominal flu, and all its trappings. Had to postpone Christmas until January 2nd. I have found through the years that the only time this formula doesn't work is: a - if you're having your monthly period, or b - if your immune system has been compromised by a recent illness (the flu, in my case).
I am not a medical doctor, but I gotta tell you, this stuff works. Start the regimen at that first little tingle that those of us who are sufferers of these things are all too familiar with, or as soon thereafter as possible, and continue until all signs of a possible blister are gone. If an actual blister erupts, scrap the treatment; it won't work once the blister actually surfaces.
I share this information in hope that someone will benefit from it. As always, ask your doctor before taking any supplements. If anyone copies this information down, please copy my blog address along with it, and come back and let me know if you've had success with it.
Talk to your doctor before taking lactobacillus acidophilus if you have any other medical conditions, allergies, or if you take other medicines or herbal/health supplements. Under certain conditions, it may be dangerous for you to take lactobacillus acidophilus.
Do not take lactobacillus acidophilus without first talking to your doctor if you are pregnant or may become pregnant during treatment. Do not take lactobacillus acidophilus without first talking to your doctor if you are breast-feeding a baby. Do not give any herbal/health supplement to a child without the advice of a doctor.

Thursday, December 30, 2010
Friday, December 24, 2010
Christmas Goody Bag Freebie & a Yummy Recipe, too! Merry Christmas!
I made this little goody bag to give away to friends and neighbors, and it is available for free here, as my Christmas gift to you! I am filling mine with Stacy's Peanut Butter Bark, a yummy concoction of Cheerios, Craisins white chocolate and peanut butter, and tied off with a sparkly, tinsel ribbon (can't punch the holes till I get the filling made, which will probably be about 2 AM tomorrow morning.) There is a 4x8" sheet of paper inside the plastic bag (I got at Michaels) to stabilize it, and the bag & sheet of paper are sandwiched between the front and back of the reindeer's base and stapled. Glitter "snow" is added to cover the staples and the reindeer's feet (which I forgot to glue on in the pic). The recipe follows...

Stacy's Peanut Butter Bark
2½ cups small pretzel twists
2 cups Cheerios
2 cups Craisins (dried cranberries) or raisins
1 cup cashew halves or Spanish peanuts
1 cup cashew halves or Spanish peanuts
10 oz. white chocolate chips, vanilla candy coating, or almond bark
1/3 cup creamy peanut butter
Lay out a large sheet of waxed paper. In a large bowl, combine pretzels, Cheerios, Craisins and nuts. In a small bowl, microwave white chocolate chips and peanut butter on high for 1 minute. Stir well. Continue microwaving for 15-30 seconds longer, until melted, stirring after each 15 seconds. Stir till smooth. Pour over pretzel mixture, stirring to coat. Quickly spread out onto waxed paper, about ½” thick. Let stand 30 minutes or until set. Break apart into 2x2” pieces. Store airtight.
Merry Christmas,
Laura
Laura
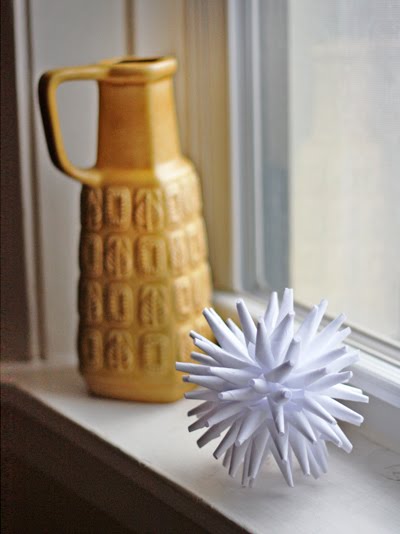
Another Beautiful Handmade Goody
I came across this gorgeous ornament at: http://howaboutorange.blogspot.com/2010/12/diy-modern-paper-ornament.html, a FABULOUS site if you like a modern aesthetic - I DO! She gives full instructions for making the ornament. Don't try it with cardstock - too heavy (voice of experience). She suggests computer paper, and that's what you should use (Laura).
Tuesday, December 21, 2010
Gleaning Christmas Ideas from others
I have been surfing alot more than designing these days, and have been so inspired by the creativity of other bloggers. Here is a sampling of some of the things I found just today. Both of these ideas are from: http://www.creaturecomfortsblog.com.
 |
| Doily & Sheet music candle wraps for battery-powered tea-lights - I mean, how lovely are they? |
 | |||||||||||||||||||||||||||||||||||||||||||||||||||||||||||||||||||||||||||||||||||||||||||||||||||||||||||||||||||||||||||||||||||||||||||||||||||||||||||||||||||||||||||||||||||||||||||||||||||||||||||||||||||||||||||||||||||||||||||||||||||||||||||||||||||||||||||||||||||||||||||||||||||||||||||||||||||||||||||||||||||||||||||||||||||||||||||||||||||||||||||||||||||||||||||||||||||||||||||||||||||||||||||||||||||||||||||||||
| Winter in a Jar |
Wednesday, December 1, 2010
A fun bloghop full of prizes!

Sunday, November 28, 2010
Woohoo! 100 followers!!!
I appreciate my sweet followers so much. You have given me so much encouragement and inspiration since I started this blog last February, after receiving my Baby Bug for my birthday in December. My sweet hubby got me an Expression at midnight on Black Friday last week at Walmart. He stood in line for an hour, and grabbed the last of SIX that they had. I can hardly wait to get going on it, and I have started to design some things for the larger scale of the Expression. Thanks so much for your encouragement, my peeps!
Laura
Friday, November 19, 2010
Mmmmmm ... Autumn Cooking
I have wanted to share this recipe for a long while - just never got around to it. It was given to me by my sister-in-law, Jami. It is wonderful with pork.

Spicy Rice
6-8 Servings
Apple cider to replace water for cooking rice, amount according to rice package
3 c. cooked long grain rice, (I like Jasmine rice) according to package*
½ c. raisins, plumped in hot cider
1 T. butter
½ c. chopped celery
½ c. chopped onion
¼ t. ground allspice
½ t. cinnamon
Salt and pepper to taste
1½ T. brown sugar
1 tart apple, cored and chopped (I used a SweeTango apple - yum!)
½ c. toasted almonds
*Cook rice according to package directions, substituting cider for water.
Plump raisins in warm water or warm cider to cover for 5 minutes; drain.
Meanwhile, in a large skillet, melt butter and sauté celery and onion until onion is crisp-tender. Add spices and seasonings, brown sugar, cooked rice, and plumped raisins. Heat thoroughly. Stir in chopped apple and remove from heat. Cover and let stand 5 minutes. Sprinkle with toasted almonds. Great with pork.
In the Mood For...
Chicken and Dumplings
Serves 6
2-3 T. x-virgin olive oil
1 onion, chopped
2 cloves garlic, minced
2 cloves garlic, minced
1½ qts. chicken stock or broth
1 lb. cooked chicken, in bite-sized pieces (rotisserie chicken in a hurry)
1 c. sliced carrots
1 c. celery, chopped, about 2 ribs
1 bay leaf
1 T. dried or 2 T. chopped fresh parsley
1/2 tsp. thyme
1 14-oz. can evaporated milk (fat free is fine)
Dumplings, recipe follows
1 lb. cooked chicken, in bite-sized pieces (rotisserie chicken in a hurry)
1 c. sliced carrots
1 c. celery, chopped, about 2 ribs
1 bay leaf
1 T. dried or 2 T. chopped fresh parsley
1/2 tsp. thyme
1 14-oz. can evaporated milk (fat free is fine)
Dumplings, recipe follows
In a large pot, heat some olive oil over medium heat and add onions and garlic. Sauté a few minutes, then add chicken stock, cooked chicken, bay leaf, and thyme. Bring to a boil. Add carrots and celery and reduce heat to a simmer. Cover and cook until carrots and celery are tender, about 10-15 minutes. When carrots and celery are almost done, add parsley and evaporated milk. Increase heat to high, bring to a boil and add prepared dumplings by tablespoonfuls. Reduce heat to low, and cook uncovered for 10 minutes. Cover and continue cooking 10 minutes more (liquid should just be bubbling gently). Serve. Store leftovers by separating dumplings from the broth, so that they don't soak up all the liquid.
Dumplings:
2 c. Bisquick
3/4 c. milk
freshly ground pepper to taste
Sage or parsley, if desired
Mix together with a fork just until dough comes together.
Tuesday, November 16, 2010
Sweetheart-Neckline Princess Dress Card
As a dressmaker, I had so much fun designing the cut file, and doing the embellishments for this card. I made it for my little granddaughter's birthday. She's a girly-girl who loves jewelry, and makeup, and pretty clothes, and is just becoming aware of princesses, so...


The SVG file is available for $1.50 USD, and includes the card and a separate overlay for the front (and back if you cut it twice), to cut from decorative paper, as well as the materials list and instructions, and the scut2 file for the Cricut. Please let me know which file it is you want. Upon notification from Paypal of funds received, I'll email you all pertinent files.
Thanks for your business! Laura
Thanks for your business! Laura
Saturday, October 23, 2010
Laura's Chicken Pot Pie
You need a 9" deep dish pie plate for this.
Makes 6 servings - Filling is also very good over biscuits.
Makes 6 servings - Filling is also very good over biscuits.
32 oz. chicken stock
3 lbs. meaty chicken parts (I used to use a pick-of-the-Chix)
1 medium onion, sliced
1 carrot, sliced into 1" chunks
2 ribs celery, sliced in 1" chunks, reserve leafy tops
1 10-oz. pkg. frozen peas & carrots
1 c. fat-free half & half or whole milk
6 T. butter
6 T. flour
Salt and pepper to taste
1 egg, beaten in a small bowl
Double Crust (Food Processor method) - from ATK - very easy to roll out.
2½ c. unbleached all-purpose flour
2 T. sugar
1 t. salt
½ c. Crisco shortening, cut into ½" pieces & chilled (easier to use sticks Crisco for this)
1½ sticks butter, cut into ¼" cubes, frozen until very firm
6+ T. ice water (start with 6, add up to 2 more if needed)
In a Dutch oven, bring broth to a boil, adding rinsed chicken parts, onion, carrot & celery chunks, along with celery tops. Reduce heat to simmer and cook for one hour.
Meanwhile, make the crust: In a food processor), combine flour, sugar & salt; process until combined. Add chilled Crisco; process 10 seconds. Add butter cubes and pulse 10 times, until it resembles coarse crumbs; transfer to a large bowl. Sprinkle 6 T. ice water over mixture all at once. Stir & press dough together using a rubber spatula, and pressing it against the bowl, until the dough sticks together. If it doesn't come together, add up to 2 more tablespoons of ice water, one at a time, pressing after each.
Divide into two even pieces. Shape each piece into a 4" disk, and wrap tightly in plastic wrap. Chill for one hour. Before rolling dough out, let it sit on the counter for 10 minutes. Lay dough on a lightly floured work surface, and roll from the center outward, into a 12" circle, about 1/8" thick. Between every few rolls, give the dough a quarter turn, tossing a little flour under it as needed. Loosely roll dough around rolling pin, and gently unroll over a deep-dish pie plate. Cover lightly with plastic wrap and chill while doing the next step .
Cool chicken in the cooking liquid if time allows. Strain and reserve broth, discarding vegetables. Return broth to heat. Meanwhile, remove chicken from the bone, discarding skin and bones. Cut into bite-sized chunks and place in a bowl. Cook peas and carrots in simmering broth, according to pkg directions. When cooked, remove from broth and add them to the chicken meat. Preheat oven to 375°. Bring broth to a boil; reduce to 3 cups liquid. Add half and half. Make a roux by kneading together 6 T. butter & 6 T. flour in a small bowl, using your fingers, and working quickly. Drop roux into simmering broth, stirring slowly until thickened. Add chicken, peas & carrots, season to taste, and pour into the chilled crust (or a 2-qt casserole, if serving over biscuits). Top with rolled out 12" diameter top crust. Trim both crusts together so that they extend 1/2" past edge of pie plate. Press the edges together and tuck under, toward the pie plate. Crimp edges. Cut vent holes with a paring knife. Brush with beaten egg, and bake at 375° for 45-50 minutes, until golden brown.
Housewarming Artwork
I was recently asked to recreate a picture of a new house - not quite finished - in paper in the form of a card. The result is not in card form, but rather a frame-able piece of custom artwork in 3D (which is hard to see in this 2D picture).

Tuesday, October 19, 2010
Babyface Favor Box
In my shameless, burning desire for more grandbabies, I have designed yet another baby-related shower accessory: a baby-faced favor box.

The box is a 1½ inch cube - just the right size for a good handful of pastel butter mints or pink or blue M&M's. It is sized for cutting on a Baby Bug, but could be enlarged for a larger cutter/larger gift - maybe even to wrap the mom-to-be's gift in. I used a pale peach paper for the face, which is glued to the top flaps of the box. I also made a face stencil so that you could marker-in the areas under the facial cutouts. I used rosy chalk to give the baby's cheeks, chin & ears a blush. The face & curl can be cut from whatever color matches the new mommy & daddy's complexions/hair color.
The svgs for the box and it's components, along with the face stencil and a picture of the finished box, and a sheet of tips is included in the price of $5.00 US. Upon notification from Paypal of funds received, I will email you the appropriate files, including the scut2 files for cutting on a Cricut. Please use the "Donate" button to order, and leave a note telling me which file it is that you want. Thanks for your interest! I appreciate your business so much!
Laura
Sunday, October 17, 2010
Aunt Essie's Plum Cobbler
We went to dinner with some old friends the other night, and I invited them back to the house for some cards and conversation afterward, so I wanted to make a dessert that would please them. I wanted something that would make them feel special, but would still be homey. Once again I turned to my trusty recipe for Aunt Essie's Plum Cobbler. The original recipe was published in Family Circle Magazine as "Essie's Plum Cobbler" and attributed to The Best from Libby Hillman's Kitchen (Countryman Press, Woodstock, Vermont). It calls for unsalted butter, and no additional salt, but that's not how I bake! For years this wonderful dessert has completed a meal with friends and family, with everyone feeling satisfied at the end.
*Note: The only changes I've made to it were according to the type of plums available, the method of preparation (I use my food processor, but you can mix it up by hand if you like), the use of salted butter, and the addition of a little more cinnamon than the original called for. It's goes together in a snap, and tastes like Grammie's been baking (actually, she has!) I hope you give this a try - it's great any time of year, but is a wonderful finish to a fall or winter meal.
Aunt Essie's Plum Cobbler
For a 9-10" quiche/tart baking dish
(I doubled the recipe for my Pampered Chef stoneware baking dish, and since I couldn't get small black plums, which are sweeter than the red ones, I used 5 gigantic red ones, quartered, then each slice cut in half width-wise. I sprinkled 2-4 T. of granulated sugar over the top of the plums before adding the topping, since they are more sour than their black counterparts.
1/4 cup light brown sugar
5-6 small black plums
1 cup flour
1 cup granulated sugar
1/2 t. Kosher salt
1 t. ground cinnamon
1 egg
1 stick salted butter, melted
Vanilla ice cream to serve
Preheat oven to 350°F. Evenly distribute the brown sugar over the bottom of the baking dish.Quarter (see *note above) & pit the plums, and place them cut sides up over the brown sugar. In a food processor, pulse together the flour, sugar, salt & cinnamon. Add the egg and pulse 5-10 times to make a shaggy dough. Pile the dough over the plums and smooth out evenly. Melt the butter in the microwave (usually 1 minute on high), and pour over the flour mixture. Place on a foil-lined cookie sheet (you'll thank me later), and bake at 350° for 40-50 minutes, until light golden brown on top. Let cool 10 minutes before serving with good vanilla ice cream. Enjoy!
Laura
Wednesday, October 13, 2010
God is Good!
I don't know about you, but I have been glued to the TV since I got up this morning, watching the miracle take place of the rescue of 33 Chilean miners, trapped over 2,000 feet below the surface of the Earth. Think of that! With my dislike of enclosed spaces, it gives me the willies. And without fail, with every one that is brought to the surface, 19 so far, I am overcome with joy, the tears well-up, and I am once again reminded of how great our God is, how He listens to our prayers and answers them, how He's given us the abilities necessary to invent the machinery used, the knowledge of how to employ them, and the safety He's granted to the whole operation so far. Praise Him, all ye peoples!
Friday, September 24, 2010
A big THANK YOU!!!
A dear friend in Australia has given me the honor of my first blog award! I couldn't be more tickled! And it's even a Cherry on Top Award - the cutest of the cute awards out there! What fun!

Now, to follow the award rules:
1. Thank the dear person who gave me the award: A kindred spirit,Carolyn, of the famed blog, http://cuttingtime.blogspot.com. I am so honored that you would do this for me! I am amazed at the things you do - way beyond my capacity!
Please visit her blog - it's outstanding. She puts untold hours into researching the intricacies of Inkscape so we can become better at our art form. Thank you, Carolyn!
2. Display the award on my blog. Done - and thank you, again!
3. Tell everyone 3 things you love. Alright - I'll share 4: Christ, Family, Sewing and paper crafts.
4. Post a picture you love.

This was taken yesterday, Sept 23, 2010. Two of the most important people in my world: my dear husband of 30 years, and our first grandchild, affectionately known as "Juju", having a great time at our favorite ice cream shop, Jeni's Splendid Ice Creams.
5. Pass the award to 5 other blogs. - I'll echo Carolyn here - how do you narrow it down to five? Hope they're all as tickled as I am! (This was extremely hard to do!!!)
Extreme Cards & Papercrafting - "Land sakes alive!" is all I have to say. Check out CPeep's amazing blog!
Allsorts - The blog of Jenny B. Harris - an amazing resource for inspiration. I go to her play pages when little visitors come over - delightful!
MelStampz - Mel is an incredibly talented lady. I go there for inspiration as much as the great downloads she offers.
Paper Pastime - Denise Hill is one very talented lady - I always come away with ideas percolating.
From an Igloo - Northern Canadian blogger, Christine, shares adorable things to sew for the little ones in your life. Tons of cuteness!
Tuesday, September 7, 2010
SCORE!

I know, compared to some others I've seen, this little storage system of mine is paltry, but it is workin' so well for me. A friend found a box-full of these wire grids at a garage sale, along with the connectors. I made this storage rack, then was able to incorporate shelves into it for every color and theme of paper I have (using zip-ties to hold them in place) - PLUS storage on the bottom for all my stuff...for $buckaroos! Cha-ching! Still have enough grids left over to build more, including hanging some over the paper area using Velcro-straps and for hinges and clasps, so little (sticky) fingers can't get at my colorful stash. Gone are the days of having to leaf through every piece of paper I had to find "the perfect one". Life is good!
Thanks Peeps!
Thanks so much to those sweeties who sent notes wondering if all was well, here, since I haven't posted in a while. I have been taking care of my elderly mom in our home for the past couple of months. She has osteoporosis, and fractured a disk (this is the 5th time this has happened! Her spine is full of cement!) She is back in her own home, now, and is doing fairly well, but I don't think she'll ever be able to walk without a walker again. I appreciate any prayers you feel led to pray for her.
I am working on some things for the blog, but in the meantime, wanted to share this little "Family Album" I created for my granddaughter, using the free, downloadable software from Zoom Album Creator. You can download the software here. It lets you select the photos you want to use, then helps you crop them, and then turns them all the right way, so that when you print them out all on one sheet of 8½x11" piece of paper, they are all turned the right direction. You then make just two slits in the paper (I scored all lines in between the photos first - glad I did), and begin folding to make the book. (The website has complete instructions.) I used semi-glossy photo paper, and I cut my own chipboard pieces, (by hand - I NEED a deep-cutting blade!) and taped the pages together with permanent adhesive, but you can buy a kit with sticky-backed photo paper and the chipboard cutouts already done for you from www.zoomalbum.net.


The outside cover has her picture on it, and the inside consists of pictures of the faces of all her daddy's side of the family. Some family members live far and wide, and hopefully this will not only help to keep them familiar to her until we get to be with them again, but also help her to learn everyone's names. I am making another one for her mommy's side of the family. The books are 3x3" - so cute, and just the right size for a little one's hands (or a grammie's purse as a brag book!)
Thursday, July 15, 2010
Cherry Gift Card Set

Hi all! I've been awaaaaaay from my Cricut for a long time, and it's good to be back.
I made a new gift set for a friend's birthday. She is a cherry freak, so it's a cherry gift card set. Hope you like 'em. If anyone is interested in the files for a particular card, let me know. They would be just the basic card itself and a few cherry designs that I cut - you'll have to come up with your own doodads, borders and ribbons. There were 8 cards in all, but one of the pix was so bad, I just said, "Forget it!" : ) Please forgive the numerous bad pix that actually made it on the page!
I got the directions for the gift box from Diane over at Capadia Designs: http://capadiadesigns.blogspot.com/2009/01/step-by-step-guide-to-making-note-card.html. It's not one you cut on your Cricut, but it's a breeze to put together, and her directions are great. It holds 8 A2 note cards and 8 envelopes beautifully. Thanks again, Diane, for all your creativity.


Thursday, June 10, 2010
Rose-topped Scalloped Favor Box


I have seen these done with punches, but I wanted a cut file for my Cricut. I made a few changes to the actual flower parts to make it easier to put together. I designed the rose leaves, and added it to the top of my Scalloped Favor Box, which is just the right size for some mints or wrapped chocolates, or even a Tim Bit, which is what my daughter had for her wedding favors.
I love this little rose. it is so real looking. I chalked the edges of some of the petals to give it depth, but it looks just as pretty without doing that. The box is a 1½" cube, and the rose measures 7/8" across and 5/8" high - tiny! It takes about 3-5 minutes to form the flower, using a pencil and some hot glue (I suggest low temp - trust me on this), so this would definitely be doable on a large scale for wedding or shower favor boxes.
The svg for the box with flower is $5.00 USD. Upon notification from Paypal of funds received, I will email you the svg's for both the scalloped Favor Box and the Rose with Leaves, as well as the scut2 file, and a sheet of directions with a picture of the finished rose-topped box. Please use the Donate button to order, and leave a note telling me which file it is that you want.
Thanks for your support - it means so much to me!
Monday, June 7, 2010
Love (that) Bug!


Sideways view of window "glass".
I'm really getting into this car-card thing. Loved doing the 1955 Ford pickup, but this VW Bug topped that. It was so much fun to design. It was requested by someone on the Yahoo SCALHints group. My little sis has a bug, so this card will be going to her for her birthday, although I'll have to put a Gerber daisy in the window in order to make it really hers. The sentiment could say, "You're not old...you're a classic." Or my personal favorite, "Some things just get better with age. Happy Birthday!" The card fits in a standard A2 envelope with room to spare on the sides. Hope you like it.
The file actually has another piece to it that I decided not to use since I was using a rather busy print. It is the part that the actual engine hood sits on (what do you call it, car people?) I would use it if I were cutting from a solid color paper, and chalk the edges. I did chalk the edges of the engine hood, to give it some definition. My car has an acrylic rear windshield, which I cut on my Cricut. It was part of some packaging for a string of deck lights, and it cut beautifully.
The designing of this file took quite a while, as you can imagine. The svg file, plus the scut2 file, along with directions for assembly are included in the price of $5.00 USD. Please use the Donate button for ordering, and leave a note in the comments box telling me which file it is that you want. Upon notification from Paypal of funds received, I will email you the svg, the scut2 file, and the instructions for making the card. Thanks you for your interest!
Saturday, June 5, 2010
Ethan's Quiet Book


Near completion! Yeah!!! The letters each hide somewhere on their page, and are attached with Velcro so that they can be used on the last page to practice spelling the little one's name and/or stored in the little pocket. The peanut in the elephant's mouth is on a string so that he can be "fed". The tent, of course, unzips; the fire hose winds around the carrier; the worm in the apple can be pulled part-way out, and the eggs can be removed from the nest and "cracked" open to reveal two birdies and the letter 'N'.
My kids actually got me my Cricut for my birthday last year thinking I could cut felt with it, and thus it would help me with my busy book designs, which I would love to grow into a business - they're so much fun to do. Now, with SCAL, I would have a blast making up patterns for cuts. If anyone has experience cutting felt or fabrics with their Cricut and would like to leave me some advice, I'm all for it!
Quiet Books - Busy Books - Pop-up Books - Just Plain FUN!

http://allsorts.typepad.com/allsorts/
I don't know if there are many of us out there, but I, for one, am wishing that the Cricut could cut felt. Thick, fuzzy, felt. I am in the process of working on two quiet books - one for my granddaughter(s), and one for a little fella named Ethan. Now, I only have one granddaughter - the beautiful little Juliette pictured here -

and I started out making this quiet book only for her, when she was just 6 months old (I know my discipline level - I was aiming to give it to her for her 3rd birthday.) A year later, although I haven't worked on it steadily, I have put in enough hours to know that it will stay at Grammie's house for all of Grammie's little girlies to play with when they come over. It is a labor of love, and a lot of work. Now, granted this particular quiet book is on rather a grand scale. It will be a doll house when it's finished, with doors that connect rooms (pages) together, and cupboards that open, an armoire in which the little outfits can hang when not in use, as well as seating for two & a doggy & toys for the little mistress of the house to play with. It is, for all intents and purposes, a pop-up book in felt. I loved pop-ups so much as a kid that I still try to get one for at least one of my kids for Christmas every year, just so I can indulge in it's pages. (Robert Sabuda, you are my hero!) I digress.
It is my plan to post my progress on this book, as well as Ethan's book, so that I will have some impetus to get it done. Ethan's book is nearly finished. In fact, today is his first birthday, and while he is still too small to play with it, I will attempt to get it to his mama within the week in honor of his birthday. Oh, yeah, I also intend to make one for all of Grammies little fellas, too. When they come along.
Disclaimer: The characters in this book are fictional and are not based on any actual persons, although the dolly's hair, eyes and complexion bear a striking resemblance to my own (especially the hair, unfortunately)!
On to the pix. These are only layouts so far - none of the pages have been sewn (or backgrounds ironed - oops!).

The doll can be slipped into both the bed and the big pink chair.

The dolls can be slipped into the chairs behind the table. The light fixture is an homage to my love of contemporary design, I had a traditional chandelier, but it just got lost on the "wallpaper". All my rooms need baseboard - I see that, now. More to come.
Subscribe to:
Posts (Atom)
LinkWithin
